How to use AWS Amplify for the frontend applications?
This article covers: Why to move to Amplify? How to deploy an app and all its features.


Before moving to the how part, let me tell you why I moved my frontend applications (React, Vue etc.) to AWS Amplify.
Why Amplify?
For deploying my frontend applications, I've been using various things like EC2, CloudFront, etc. But there are problems with managing everything on our own in an organization:
- There are different environments like production, staging, development, etc. And we have to manage all these instances on our own.
- We have to manage the
CI/CDpipelines for all these environments. In large organizations, that leads to some dependencies on the platform team. - If the application is using some
environment variables, it may vary for each environment. And managing them is a different headache. - If that is a SaaS product and we have to serve it via our client's domain, we have to implement a separate system for enabling that. (For example, you have 10 clients that are using this application. And they want this application to be served from their domain instead of your companies domain.)
- We have to manage separate Nginx/Apache (or any other server) configs to handle
rewrites and redirectsor to passcustom headers.
A single amplify app can solve all these problems.
How to deploy an app?
There are the things we need in order to deploy an app.
- Connecting a repository and selecting a branch
- Adding build settings
- Connecting different branches for different environments
- Handling environment variables
- Adding custom domains
- Creating notifications/alerts if the build fails
- Monitoring
- Password Protect your site
- Enable PR Previews
Connecting a repository and selecting a branch
While creating an app, we'll need to give Amplify access to your Gitlab, Github, Bitbucket, etc., account. After that, we can see the list of all the repositories available to us in that account.
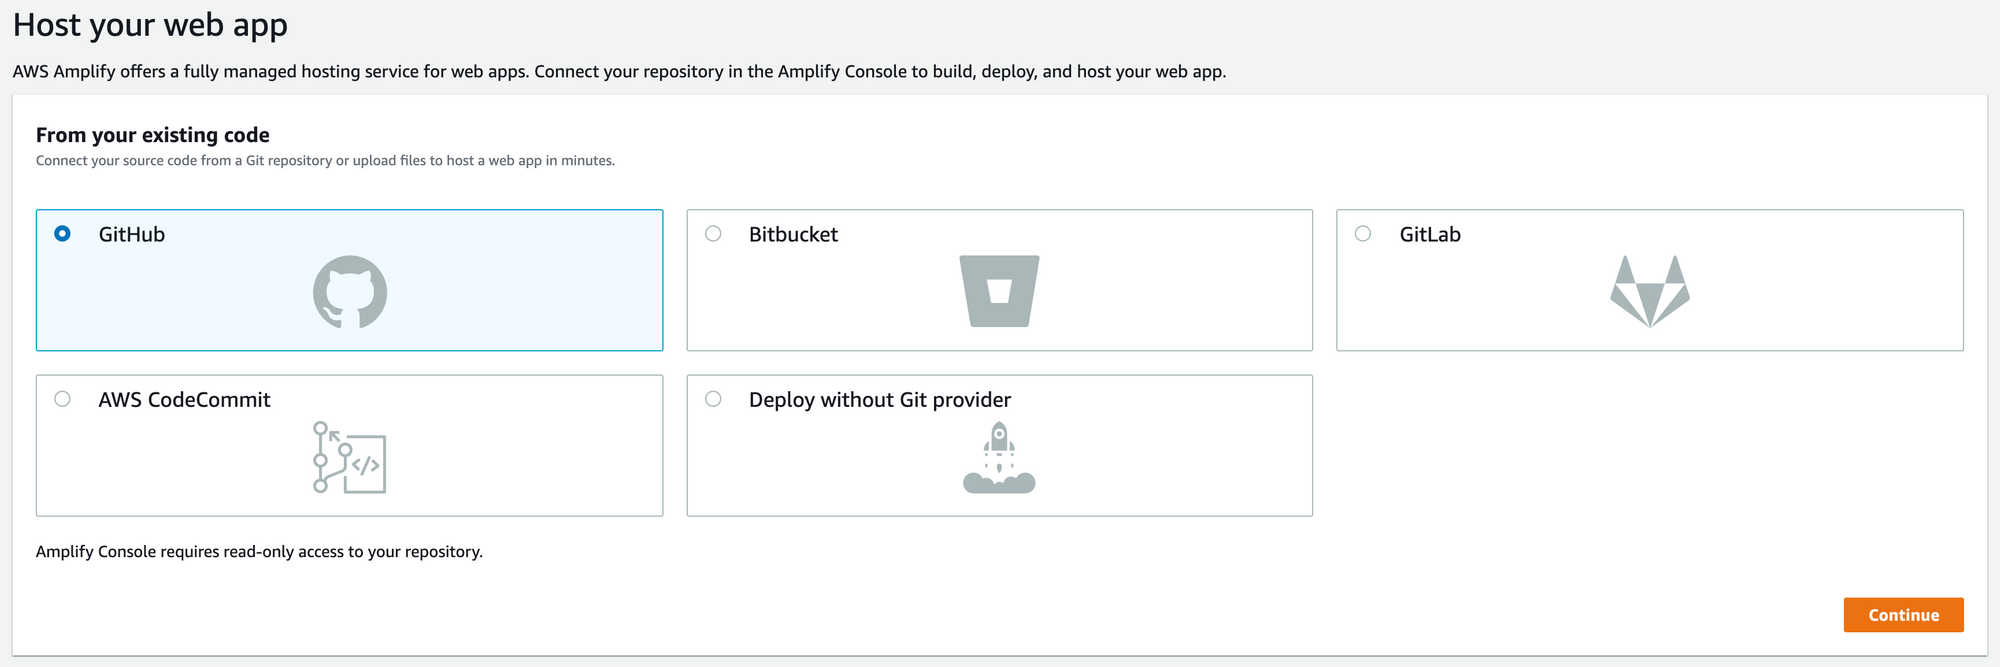
Select the repo and a branch to deploy it.
Adding build settings
Use this as a reference to generate the build settings.
For our applications, we need to download the npm packages before building our applications. For that, Amplify has a preBuild phase. The code should look something like this:
frontend:
  phases:
    preBuild:
      commands:
        - 'npm ci'
To build the application, we can simply add this configuration:
build:
  commands:
    - 'printenv >> .env'
    - 'npm run build'
We'll discuss more on printenv command in the Handling environment variables section.
Also, after npm run build, it generates the build files and stores them in the build folder in the root directory. For Amplify to detect that folder and serve from that, we need to provide the path under artifacts.
artifacts:
  baseDirectory: /build
  files:
    - '**/*'
Connecting different branches for different environments
In Amplify, we can simply connect different branches to manage different environments.
For example, the master branch can serve the production environment, the dev branch can do the same for the development environment, etc.
Behind the scenes, it is using different CloudFront distributions for each branch.
We can simply do this using the UI but if you face any issues there, this command can help you if you have sufficient access. Replace your Amplify app's app-id and branch name accordingly.
aws amplify create-branch --app-id d1kkiwslwnw735 --branch-name devHandling environment variables
Using Amplify's UI, one can easily add the environment variables. But there are chances that the value of those variables may change as per the environment.
To handle this, by default we pass a value for all the environments and we can override those values as per the environment/branch.

But there is a catch here.
If we directly try to access our variable using process.env.MY_VARIABLE, its value will be undefined. (But why? — Because it generates static HTML, CSS, JS files. They can't access process on runtime.)
To access those variables, we need to have a .env file. We can add those variables during prebuild phase as we discussed earlier in the section above.
We can choose to add all the environment variables manually. Or we can use printenv command to get all the environment variables available to the OS at that time and store them in a .env file.
You can refer to this official documentation for more information
Adding Custom Domains
To add a custom domain, we can simply go to the Domain Management section and add any domain name.
It generates a free SSL certificate using ACM for our domain.
If we don't configure it properly, we may see this error in your browser: ERR_SSL_PROTOCOL_ERROR
After struggling a bit with the custom domains, I finally figured out what all the configurations actually mean. Let's take an example to understand this.
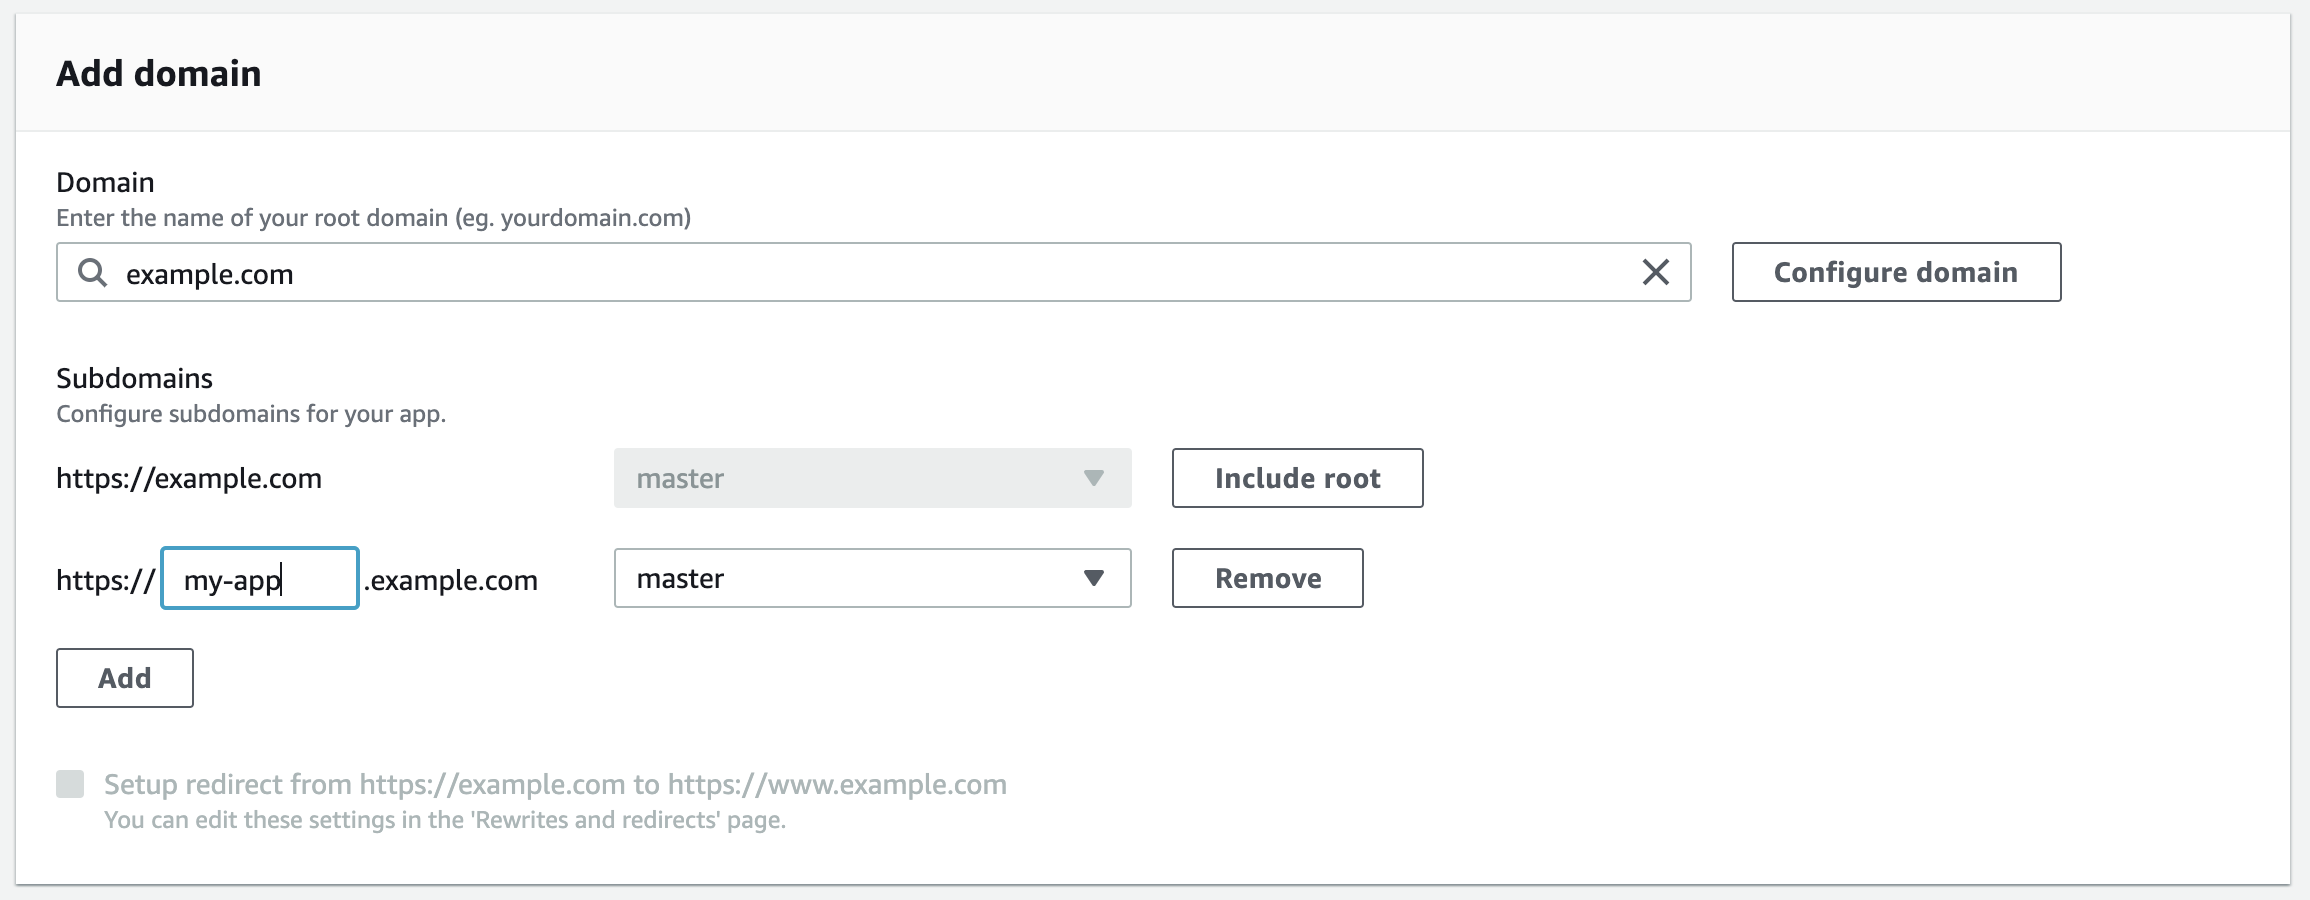
Let's say I want to add my-app.example.com to the list.
- First, add
example.com(and notmy-app.example.com) to configure the domain. - You may see the list of subdomains now. (
wwwby default with redirection) - If you don't want to forward
example.comitself, you need to clickExclude Root. By doing so, it won't create an SSL certificate for the root domain. - You may also want to remove the checkbox which sets up the redirect from the root domain to its subdomain.
- Instead of
www, you have to putmy-appand hit the Save button. - It will generate a few CNAME records. Add all of them using your DNS providers (like GoDaddy) to verify the ownership.
- After verifying the ownership, finally, it'll generate a CNAME record for your subdomain. Add it from your DNS provider and in a few minutes, you'll see the message that you've configured the custom domain successfully.
We can also perform the actions above using AWS CLI to automate this process.
Creating notifications/alerts if the build fails
In the Notifications section, we can configure the email alerts per environment/branch if the build fails.
Monitoring
You don't need any third-party tool for monitoring basic stuff like:
- Number of Requests
- HTTP Status Codes
- Response times (Latency)
You can monitor these basic things from Amplify UI.
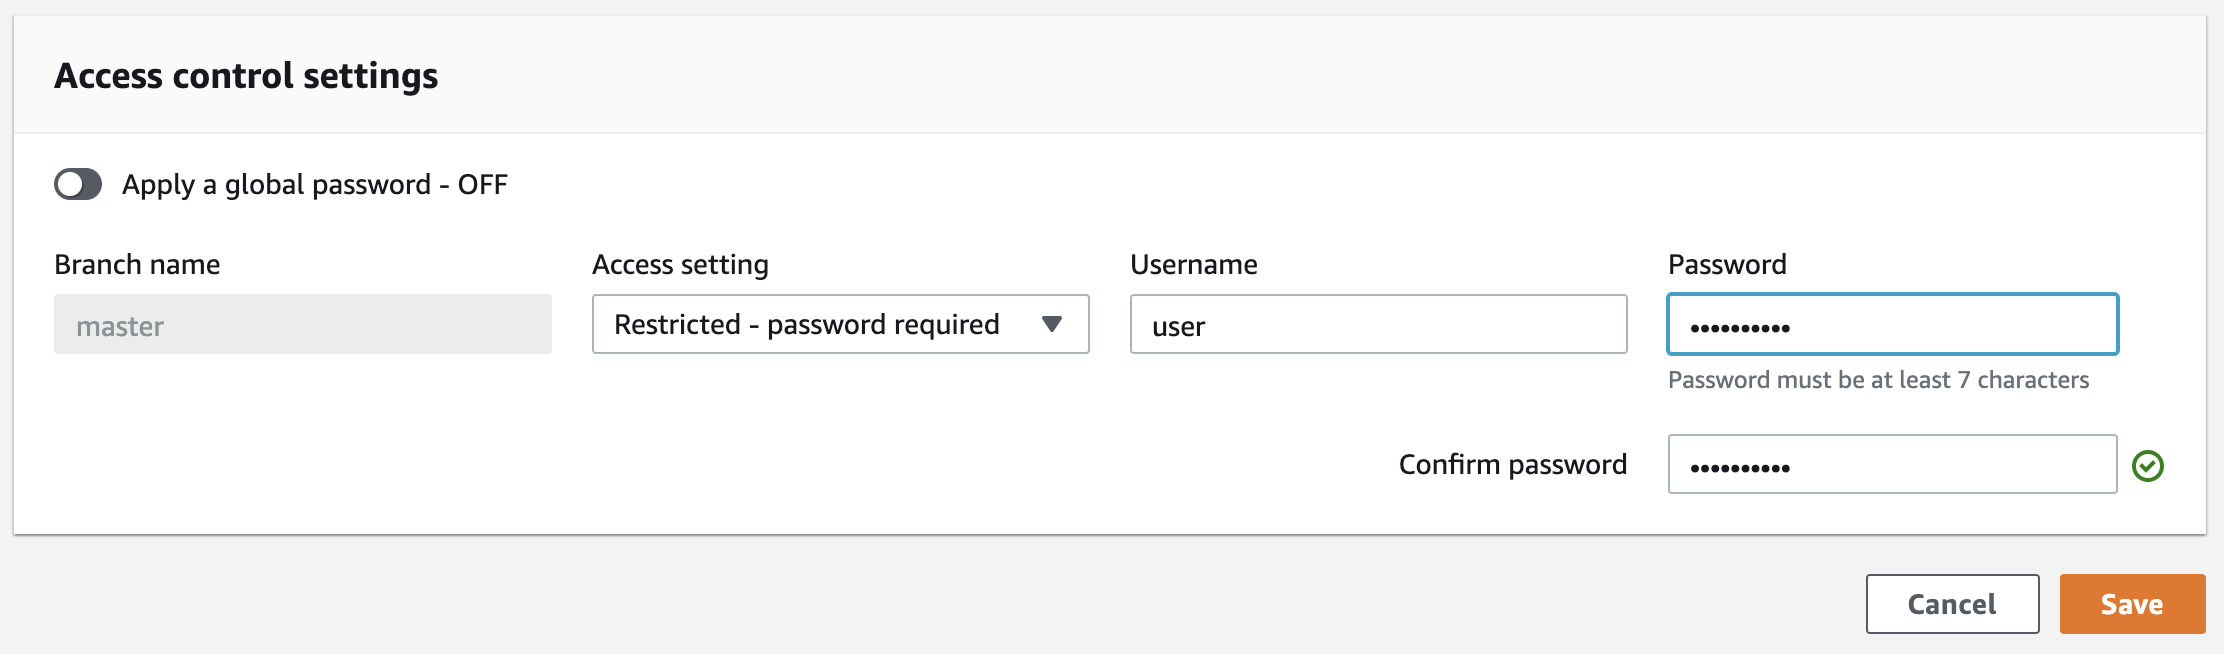
Password Protect your site
To prevent unwanted people from accessing your app, we can use this feature.
Go to Access Control and click on Manage access.
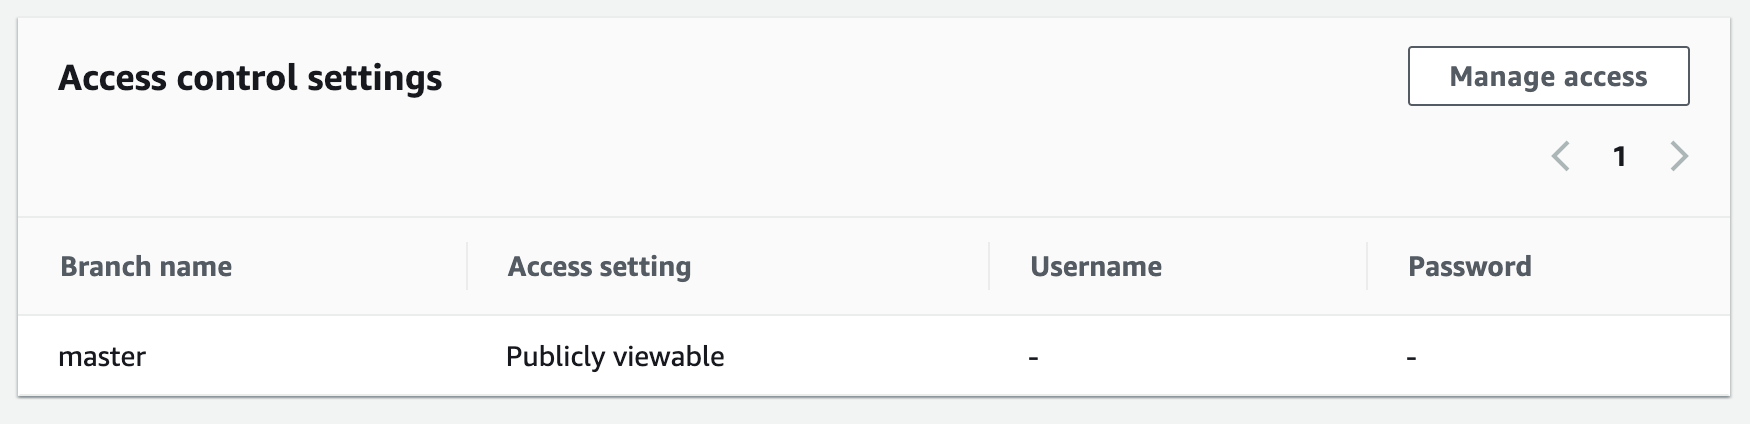
Change the Access settings and enter the Username and Password
Enable PR Previews
This comes handy while we raise Pull Requests to review and merge the code. It creates a temporary application from a PR for the reviewer to test the changes.
Once the reviewer merges the PR, it automatically destroys the environment. It is also visible on the PR page of Github.
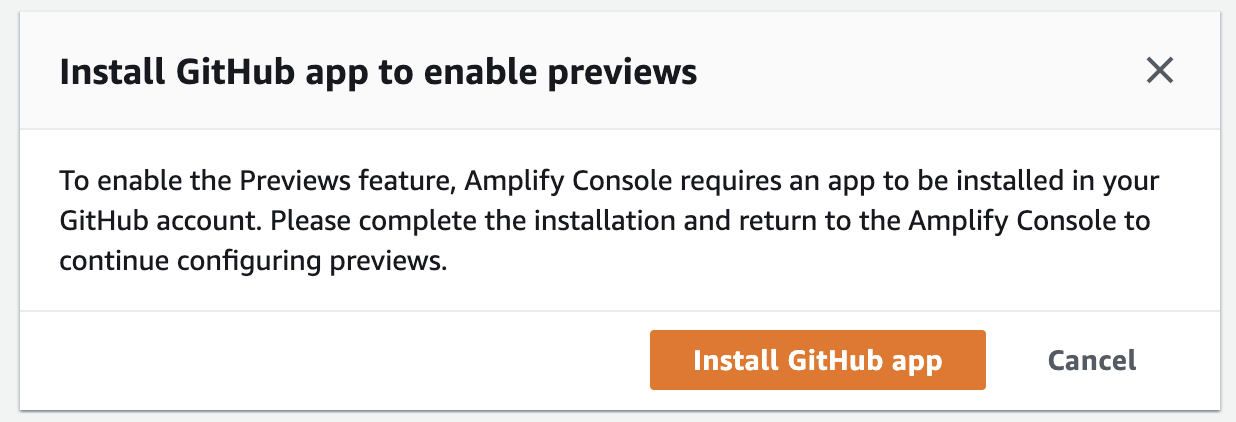
To enable this, go to Previews section and click on Enable previews.

It may ask you to install Github app.
Once everything is handled, you can raise a PR check this configuration.
Conclusion
AWS Amplify makes it very simple to deploy of the frontend application. We don't need any other tools for configuring CI/CD, handing environment variables or managing custom domains. It removes a lot of deployment headache and helps us focus on the development.